Clock Sticky Tutorial
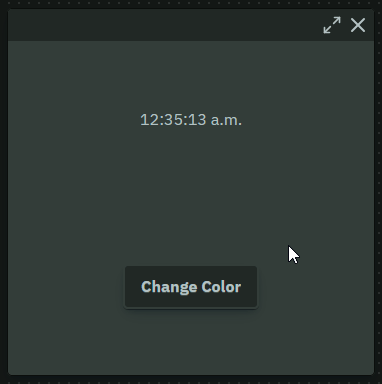
In this tutorial, we will build a Clock Sticky that displays the current time, allows changing its color, and remembers the color when closed and reopened. Here's the final result:
We'll use the global mc object provided by the application to interact with the sticky system. You can follow along by pasting the code snippets into your browser's developer console.
Step 1: Display Time
Let's start by creating a sticky that simply shows the current time and updates every second.
Action: First, navigate to https://mencrouche.com, then copy and paste the following code into your browser console.
// We first define the structure and behavior of our 'clock' sticky
// using mc.registerSticky. This makes the 'clock' type available.
mc.registerSticky({
type: "clock", // Unique type name for our sticky
onMount(sticky) {
// onMount runs when the sticky is created or restored.
console.log("Clock sticky mounted");
const timeElement = document.createElement("time");
// 💡 Use sticky.replaceBody() to set the content of the sticky.
// It replaces any existing content in the sticky's body area.
sticky.replaceBody(timeElement);
// Function to update the time display
function updateClock() {
const now = new Date();
timeElement.textContent = now.toLocaleTimeString();
console.log("update clock");
}
// 💡 Update time immediately and then every second using setInterval.
updateClock();
setInterval(updateClock, 1000);
},
onSave(sticky) {
// onSave runs when the sticky's state needs to be saved.
// Nothing to save for now.
console.log("Clock sticky save requested");
},
onDelete(sticky) {
// onDelete runs just before the sticky is removed.
console.log("Clock sticky delete requested");
// No cleanup needed yet.
},
// Optional CSS for basic centering
css: `.stickyBody { display: grid; place-items: center; }`,
});
// Now, we create an instance of our 'clock' sticky on the workspace
// using mc.workspace.createSticky.
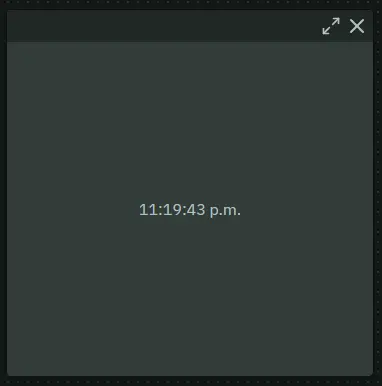
mc.workspace.createSticky({ type: "clock" });✅ Result: You should see a new sticky appear, displaying the current time, which updates every second.
Step 2: Clean-up Resources
In Step 1, our setInterval function runs every second to update the clock. However, if you close the sticky, this interval will keep running in the background, which is inefficient (a "memory leak"). We need to stop it when the sticky is deleted.
Action: To ensure we register the new version of our plugin code and avoid conflicts with the previous step, first refresh the page. Then, paste the updated code below into your browser console.
mc.registerSticky({
  type: "clock",
  onMount(sticky) {
    console.log("Clock sticky mounted");
    const timeElement = document.createElement("time");
    sticky.replaceBody(timeElement);

    function updateClock() {
      const now = new Date();
      timeElement.textContent = now.toLocaleTimeString();
      console.log("update clock");
    }

    updateClock();
    // 💡 Store the intervalId for later cleanup.
    // sticky.plugin is a safe object provided for storing runtime data
    // associated with this specific sticky instance.
    sticky.plugin.intervalId = setInterval(updateClock, 1000);
  },
  onSave(sticky) {
    console.log("Clock sticky save requested");
  },
  onDelete(sticky) {
    console.log("Clock sticky delete requested");

    // 💡 Use clearInterval with the stored intervalId to stop the timer.
    clearInterval(sticky.plugin.intervalId);
    console.log("Interval cleared");
  },
  css: `.stickyBody { display: grid; place-items: center; }`,
});

mc.workspace.createSticky({ type: "clock" });
✅ Result: Create the sticky. You should see "update clock" messages in the console every second. Now, close the sticky (delete it). The "update clock" messages should stop appearing in the console.
Step 3: Add Color Changing & Persistence
Let's add a button to change the clock's text color randomly. Crucially, we also want the sticky to remember the chosen color even after it's closed and reopened (e.g., via undo). This requires saving and restoring state.
Action: Paste the final version into the console.
mc.registerSticky({
  type: "clock",
  onMount(sticky, origin) {
    // The 'origin' argument tells us if this is a 'create' or 'restore' event.
    console.log(`Clock sticky mounted (origin: ${origin})`);

    const timeElement = document.createElement("time");
    const randomColorBtn = document.createElement("button");
    randomColorBtn.textContent = "Change Color";

    // Put both elements into the sticky body
    sticky.replaceBody(timeElement, randomColorBtn);

    // Function to update the clock display
    function updateClock() {
      const now = new Date();
      timeElement.textContent = now.toLocaleTimeString();
    }

    // Start the clock timer
    sticky.plugin.intervalId = setInterval(updateClock, 1000);
    updateClock(); // Initial display

    // Add button functionality
    randomColorBtn.addEventListener("click", () => {
      const randomColor = "#" + (~~(Math.random() * (1 << 24))).toString(16).padStart(6, '0');
      console.log("Changing color to:", randomColor);
      timeElement.style.color = randomColor;
    });

    // 💡 Restore state if this sticky is being restored from saved data
    if (origin === "restore") {
      console.log("Restoring color:", sticky.pluginConfig.color);
      timeElement.style.color = sticky.pluginConfig.color;
    }
  },
  onSave(sticky) {
    // onSave should return a JSON-serializable object with data needed for restoration.
    // This object will be passed back as 'sticky.pluginConfig' in onMount(..., "restore").
    console.log("Clock sticky save requested");
    return {
      // 💡 Save the color stored in time element
      color: sticky.querySelector("time").style.color,
    };
  },
  onDelete(sticky) {
    // Cleanup the timer interval
    console.log("Clock sticky delete requested");
    clearInterval(sticky.plugin.intervalId);
    console.log("Interval cleared");
  },
  css: `.stickyBody { display: grid; place-items: center; }`,
});

mc.workspace.createSticky({ type: "clock" });
✅ Result:
- A sticky appears with the time and a "Change Color" button.
- Click the button multiple times to change the text color.
- Note the last color you set.
- Close (delete) the sticky.
- Press Ctrl+Z to undo the deletion.
- The sticky should reappear with the exact same color it had before you closed it.
This works because:
- The
onSavefunction returns an object{ color: timeElement.style.color }and is saved in the application. - When the sticky is restored (via undo),
onMountruns withoriginas"restore". The saved object is provided assticky.pluginConfig. - Our
onMountcode checks iforiginis"restore"and applies thesticky.pluginConfig.colorto thetimeElement.
🎉 Congratulations! You have successfully built a clock sticky that updates, cleans up after itself, includes interactive controls, and persists its state across sessions using onMount, onSave, and onDelete.